Geofencing Datawell buoys
Introduction
Customers have reported that they sometimes lose wave height measurement buoys. Causes can be various: bad weather, anchoring malfunction, faster as expected corrosion of the anchoring and many more. Once the buoy comes loose it is free to roam with the current it most likely is lost if no fast intervention is performed. Sometimes you are lucky and it will wash ashore on a nearby sandy beach and it can be retrieved with minimal damage. However in most cases it will either be destroyed hitting a rocky shoreline or it is lost adrift on the open ocean.
Losing the buoy not only presents you with a costly replacement, but most of the time having no measurement data available on your site or harbor, until a replacement buoy arrives, is an even bigger concern.
Most buoys have position information provided by an on-board GPS receiver. This insight paper focuses on how to use this position to put in place a geofence and couple it to a notification system. This setup is easy to configure and provides you with an early notification so you can react and retrieve your buoy before it is lost.
The solution described in this paper is based on Tendo. Tendo is a software application designed by MGB-Tech to solve your metocean monitoring puzzle. It enables you to collect and process data from virtually any sensor and store it safely in a database. Buoys are a much used source of measurement data and the Datawell waverider buoys are an industry standard for wave height measurement. Our Tendo application can collect all information from this buoy and perform various waveparameter calculations on the data.
Tendo has ![]() Checks,
Checks, ![]() Alarms and
Alarms and ![]() Notifications that work together to have an automated quality control system. Its geofence check can be used to monitor the position of the waveheight buoy. Once it drifts out of location you will receive a notification so you can respond before it is to late. Our customers have on multiple occasions been able to respond to this notification and retrieved the buoy safely and undamaged.
Notifications that work together to have an automated quality control system. Its geofence check can be used to monitor the position of the waveheight buoy. Once it drifts out of location you will receive a notification so you can respond before it is to late. Our customers have on multiple occasions been able to respond to this notification and retrieved the buoy safely and undamaged.
This paper will first start by explaining the three features and how they work together. We will then go in a step by step configuration example that you can use as a guide to setup your own system.
Tendo checks alarms and notifications
Checks
A check ![]() is a Quality Control feature, which checks each DataPoint of a Feed against certain criteria. The result of a Check for each DataPoint is a CheckConclusion, which can either be S (Success) or F (Failure). Success means that the DataPoint involved, successfully met all the configured quality criteria checked by the Check.
is a Quality Control feature, which checks each DataPoint of a Feed against certain criteria. The result of a Check for each DataPoint is a CheckConclusion, which can either be S (Success) or F (Failure). Success means that the DataPoint involved, successfully met all the configured quality criteria checked by the Check.
Failure means that the DataPoint involved, at least failed 1 configured quality criterium checked by the Check.
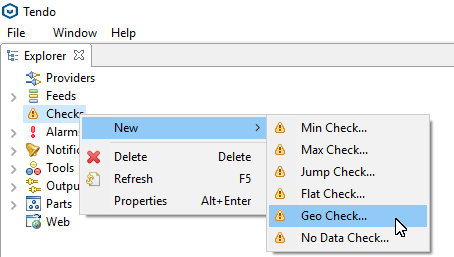
Various Checks exist like a Min , Max , Jump , Flat , No data, Geo..
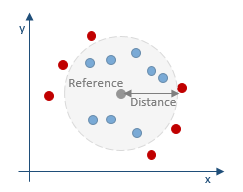
A Geo Check will check whether a DataPoint is less than a distance away from a reference point. When the distance between the checked DataPoint and the Reference is higher than the configured Distance this will result in a Failure, if its less it will result in a Success A geo data check is applicable only for Structured Data Feed of parameter LOCATION.
You can configure the following parameters:
- Enabled: Enable (1, true, yes) or Disable (0, false, no) this check. e.g. yes
- Reference: Reference location
- Distance: Absolute value distance threshold in meter which shouldn’t be exceeded.
Please note that the reference location must be degrees lat lon.
Alarms
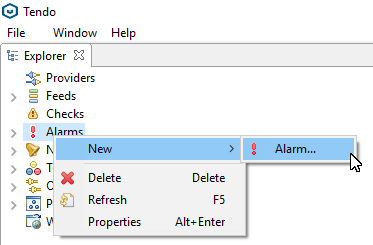
An Alarm![]() is a Quality Control feature that decides when a series of checks raises an alarm. It is seldom the case that a single failure of a check justifies an alarm and a notification.
is a Quality Control feature that decides when a series of checks raises an alarm. It is seldom the case that a single failure of a check justifies an alarm and a notification.
An alarm has 4 different states :
- UNKNOWN: at the beginning an alarm starts in the UNKNOWN state, giving no preference to any other state.
- OK: the OK state means the check and its feed involved are in a normal and acceptable state.
- WARNING: the WARNING state means the check and its feed involved are no longer in a normal state, but show signs to start worrying about.
- ALARM: the ALARM state means the check and its feed involved are in a troubled state, which need urgent attention.
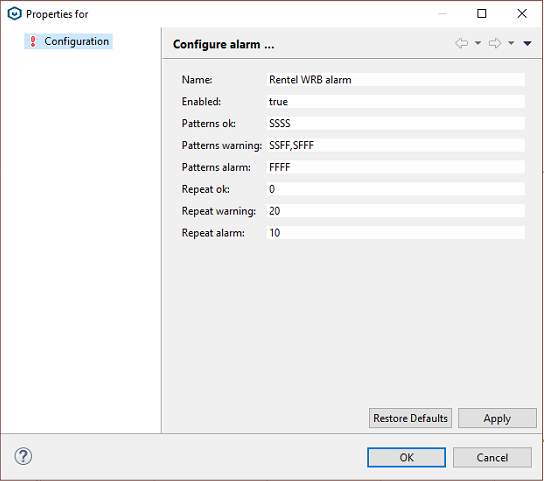
An Alarm transitions from one state to another state, based on its configured patterns. A pattern is declared by a sequence of “F” (Failure) and “S” (Success) characters in a string. At any time when an Alarm’s Check evaluates to a certain pattern, the state of the Alarm will transition to the state where the pattern belongs to. One or more patterns can be assigned to a state and patterns can vary in length. When an Alarm transitions from one state to another state, it will trigger a notification.
Repeats:
Triggering of a notification is implicit with each state transition. So a transition from OK, to ALARM will raise a notification. With repeats you can configure per state, if and how frequent one would like to be re-notified. When the value is 0, only the first transition there will be a notification. When the value is 1, every time we enter the same state there will be a notification. When the value is N, every N-th time we enter the same state there will be notification. Take care when configuring your alarm to not start a notification flood.
Notifications
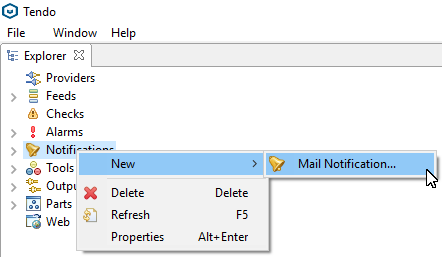
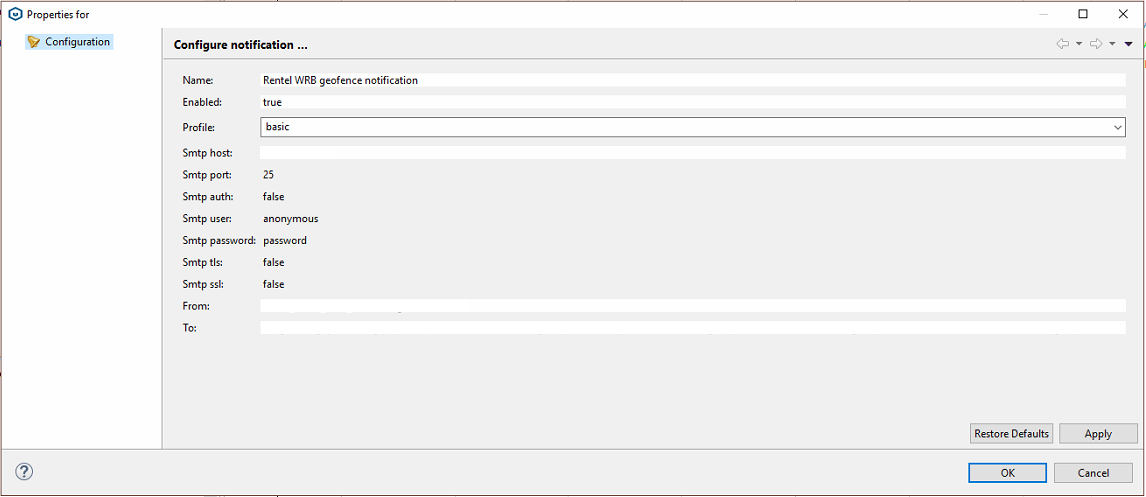
A Notification ![]() is a Quality Control feature, which reacts on Notification events and translates this event into a physical Notification. Currently only the e-mail notification is available by default, other forms can be configured on demand. This notification feature will send an e-mail everytime an ALARM is raised. Please note that you will need a valid e-mail account to send the e-mails.
is a Quality Control feature, which reacts on Notification events and translates this event into a physical Notification. Currently only the e-mail notification is available by default, other forms can be configured on demand. This notification feature will send an e-mail everytime an ALARM is raised. Please note that you will need a valid e-mail account to send the e-mails.
These three quality control features can be used together to configure a system that fits your needs. Please note that you can add one or multiple data feeds to a check. You can add one or multiple checks to an alarm and you can add one or multiple alarms to a notification. You can off course have multiple checks, alarms and notifications working together or next to each other. As an example it is possible to configure 2 geofencing checks: one on 150m and one on 500m that each check 10 buoy positions and add them to the same alarm sequence. This way you will give an alarm whenever a buoy goes over the 150m geofence and a second alarm when it goes over the 500m geofence.
Tendo configuration
First you need to configure the geofence check. Please note that you can create as many checks as you like and you can do this on every position feed in Tendo. It does not matter if the data is coming from a Datawell waveheight buoy or a GNSS receiver or if it is the position of a ship you want to geofence. The procedure is always the same and it does not matter to Tendo what the source is.
Configure the check
Give the check a meaningfull name so that when you later receive a notification you can easily remember what it is about. You can enable or disable the check. For our use case it is best to take the anchor position as the reference position and use a meaningful distance that the buoy can move. This distance can be calculated based on the length of the anchor system, the seafloor depth and the tide conditions. To not overcomplicate the situation, the length of the anchor system multiplied with a safety factor of eg 1.5 can be used. Please note that the distance parameter is in meter.
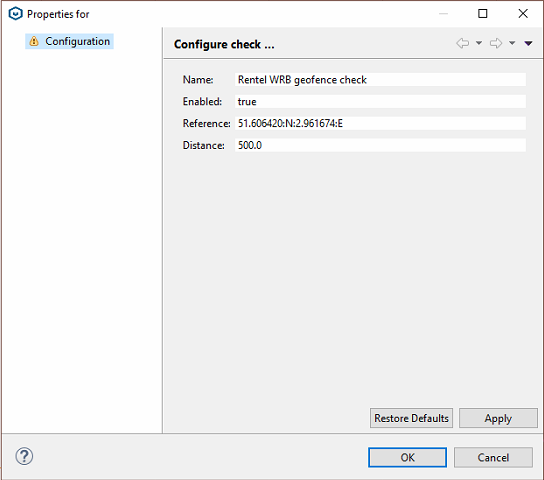
Once you have configured the check, do not forget to add a data feed to this check! It is on this feed that the actual check will be performed. Please note that you can add multiple feeds to the check, they will all be held to the same check. To add a check simply drag and drop the desired POSITION feed into the check.
Configure the alarm
Give the alarm an meaningful name. We recommend for standard applications that you use patterns as showed below. Off course you can adjust these if you desire different behavior. Give due attention to the Repeat numbers. When the value is 0, only at the first transition will trigger notification. When the value is 1, every time we enter the same state there will be a notification. When the value is N, every N-th time we enter the same state there will be notification. Ask yourself the question how many notifications you would like to receive once the buoy is drifting.
Configure the notification
Give your created notification a meaningful name. It is important that you configure a working e-mail account.
Test the notification configuration
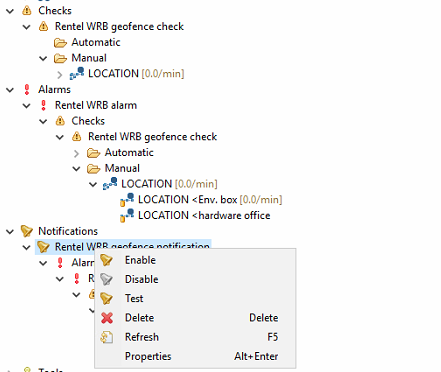
Once configured, please test your notification configuration. Tendo has a build in notification test. Right-click on the created notification and select ![]() Test. Tendo will send you a test e-mail to verify everything is working. Please check that you received this e-mail.
Test. Tendo will send you a test e-mail to verify everything is working. Please check that you received this e-mail.
Fit the pieces together
Now that you have configured all the individual parts (![]() Checks,
Checks, ![]() Alarms,
Alarms, ![]() Notifications) you will need to make them work together. To do so simply drag and drop the configured check in the alarm and the alarm in the notification. You should get a view like this :
Notifications) you will need to make them work together. To do so simply drag and drop the configured check in the alarm and the alarm in the notification. You should get a view like this :
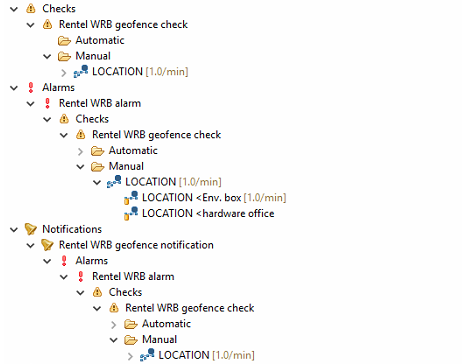
Please note that when you expand the notification node, you should see the LOCATION feed at the lower level and then find the check, the alarm and the notification at the top level.
Result
After following the above demonstrated steps, you now have a system that will geofence your buoys and give you an early warning system when the buoy gets adrift. Every time you receive a new position sample from the buoy, the ![]() Check feature will evaluate the sample, the
Check feature will evaluate the sample, the ![]() Alarm feature will, depending on the configured patterns and repeats, trigger a notification that the
Alarm feature will, depending on the configured patterns and repeats, trigger a notification that the ![]() Notification feature will deliver it to you by e-mail. This setup is highly configurable to your needs and scales well. Please note that this setup can also be used to monitor other measurements made on you site that are critical to its safety and efficiency.
Notification feature will deliver it to you by e-mail. This setup is highly configurable to your needs and scales well. Please note that this setup can also be used to monitor other measurements made on you site that are critical to its safety and efficiency.


